 BANNERS FOR HIRE
Hex tactics guide: zone of control, flanking, terrain and morale
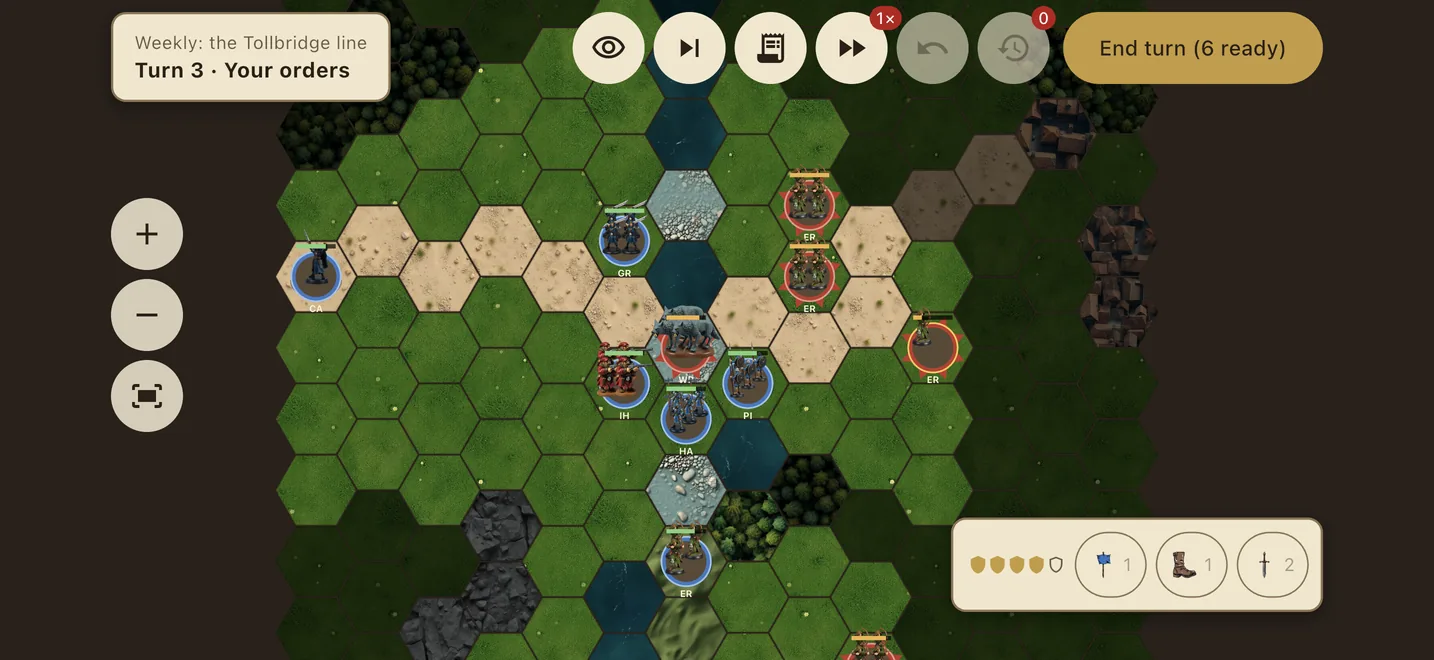
Hex tactics look simple: move a unit, attack, end turn. The depth comes from how a handful of rules interact. Terrain, zones of control, flanking, support and morale turn a hex map into a puzzle where one well-placed unit can hold a river and one careless move can lose a veteran. This guide explains each of those ideas in plain language, with examples from Banners for Hire, our turn-based fantasy hex wargame.
The principles apply to most games in the genre, including the classic 90s fantasy wargames. Exact numbers and rules differ from game to game, so when we talk about Banners for Hire specifically, we say so.
1. Read the ground before you move
Terrain is the first thing to look at in any hex wargame. Before touching a unit, scan the map for:
- Choke points: fords, bridges, mountain passes and gaps between forests, where the enemy has to come through a narrow front.
- Defensive ground: hills, woods and towns that make your units harder to dislodge.
- Open ground: where cavalry and charges are at their best, and where your infantry is most exposed.
In Banners for Hire, the ground shapes every battle. The landing page puts it simply: read the ground, hold the ford and break the line where it bends. A good first move is often not an attack at all, but stepping a sturdy unit onto the hex that controls a crossing.
2. Line of sight: you can only hit what you can see
Archers and other ranged units are only as good as what they can see. Hills, woods and other units can block line of sight, so a longbow unit placed one hex too far back may spend a turn doing nothing. When you position ranged units, check what they will be able to see next turn, not just this one.
Line of sight also matters defensively. A unit tucked behind a ridge or forest edge can be safe from enemy archers that would otherwise pick it apart. Banners for Hire models line of sight in hex battles, so this is a real decision, not decoration.
3. Zones of control: how a line holds
A zone of control is the ring of hexes around a unit that it "pins". Enemies moving into it are slowed or stopped, which means they cannot simply stroll past your front line to reach the archers behind it. That is the single most important idea in hex wargames, and Banners for Hire includes zones of control in every battle.
Practical tips:
- Leave no gaps. Units placed so their zones overlap form a wall. A gap of two hexes is often an invitation.
- Use terrain to shorten the line. Anchor one end on a river, cliff or forest so you need fewer units to hold it.
- Screen your valuable units. Put tougher units in front so enemies get stuck in their zones before they reach archers or specialists.
4. Flanking and charges: breaking a line
If zones of control are how you hold, flanking is how you break. Hitting a unit from more than one side is usually far more effective than attacking it head-on, and on a hex grid it is easy to see when an enemy has an exposed side. Banners for Hire rewards flanking, and it adds charges, so a mounted unit with room to build up an attack can hit much harder than one that starts next to its target.
The classic pattern is to pin an enemy unit from the front with infantry, then bring cavalry or a second unit around the side. Do not commit the flanker until the pin is in place, or the enemy will simply turn and face it.
5. Support fire: never fight alone
Units that stand together fight better. Support fire in Banners for Hire means nearby units can add to a fight, so a cluster of units that cover each other is much stronger than the same units spread across the map. The flip side is that an isolated unit is the easiest target on the board. When you look at the enemy, look for the unit that has wandered away from its friends.
6. Morale: winning without killing everything
Soldiers are not machines. In games with morale, units that take heavy losses, get flanked or see their friends fall can waver or break. That changes how you fight: sometimes the best attack is the one that breaks the nerve of the enemy line, not the one that does the most damage. Banners for Hire includes morale in hex battles, so protecting your own units' nerve matters as much as attacking.
Keep battered units out of the front line, rotate fresh ones forward, and avoid leaving a weakened unit where it can be surrounded.
7. Honest forecasts, undo and Ironman
Many players drift away from wargames because hidden dice make careful planning feel pointless. Banners for Hire shows an honest forecast before every attack, with no hidden dice, so you can see what an attack will do before you commit to it.
You can also undo moves or rewind a turn, which is ideal while you are learning or experimenting. If you prefer every order to stand, Ironman mode turns that off (see Ironman mode vs undo). A good habit is to use the forecast on two or three possible attacks before choosing, rather than taking the first one that looks good.
And the enemy is held to the same standard. The AI in Banners for Hire plays by your rules and sees only what its soldiers see, so you can set ambushes and expect them to work.
8. Fog of war and weather
Night raids in Banners for Hire are fought under fog of war: you only see what your units can see, so scouting becomes part of the battle. Move carefully, keep units in support range and assume there is something in the woods until you know otherwise.
Weather changes the picture too. Rain, snow and mist all appear in Banners for Hire and change how a battle plays. Rather than memorising rules, treat bad weather as a reason to be more cautious: tighten the line, rely more on positioning and less on long-range plans.
9. Think about the next battle
In a campaign game, winning is only half the job. The units that survive carry forward, and in Banners for Hire every soldier has a name, gains ranks up to Legend, earns traits and carries scars. Losing a veteran to win a battle slightly faster is usually a bad trade. We cover that side of the game in how to run a mercenary company.
A simple first-battle checklist
- Scan the map for choke points and high ground.
- Form a line with overlapping zones of control, anchored on terrain.
- Keep ranged units behind the line with clear line of sight.
- Check the forecast on two or three attacks before committing.
- Pin first, then flank or charge.
- Pull back battered units before they break.
- Do not trade a veteran for a faster win.
Want to practise? Set up a battle in skirmish mode or the scenario editor. New to the genre? Start with what a fantasy hex wargame is. Coming from the classics? See our roundup of games like Fantasy General on mobile.
FAQ
What is a zone of control in a hex wargame?
The ring of hexes around a unit that it controls. Enemy units entering those hexes are slowed or stopped, so they cannot simply walk past. It is what lets a thin line of units hold a wide front.
How does flanking work on a hex grid?
Attacking a unit from more than one side, or from the side or rear, is usually rewarded. Because every hex has six neighbours, it is easy to see when an enemy is exposed and how many of your units can reach it.
Does Banners for Hire use hidden dice rolls?
No. Banners for Hire shows an honest forecast before every attack, with no hidden dice, so you can plan around the outcome instead of hoping for luck.
Can I undo a move in Banners for Hire?
Yes. You can undo moves or rewind a turn. If you want every order to stand, you can play in Ironman mode instead.